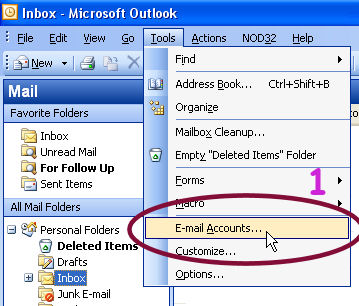
1.) Click on Tools, then select E-mail Accounts from
the drop down menu
2.) Select Add a new e-mail account

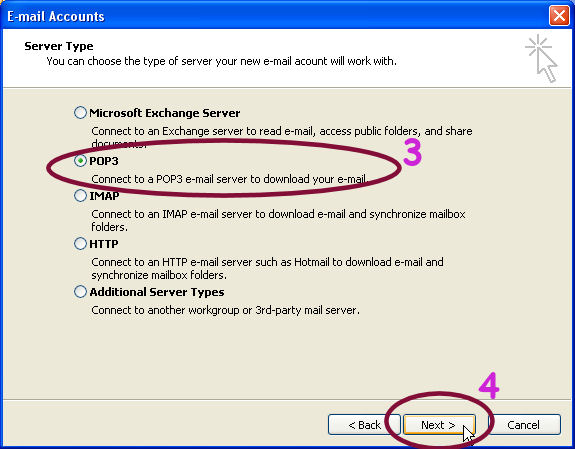
3.) Select POP3
4.) Click on the Next button
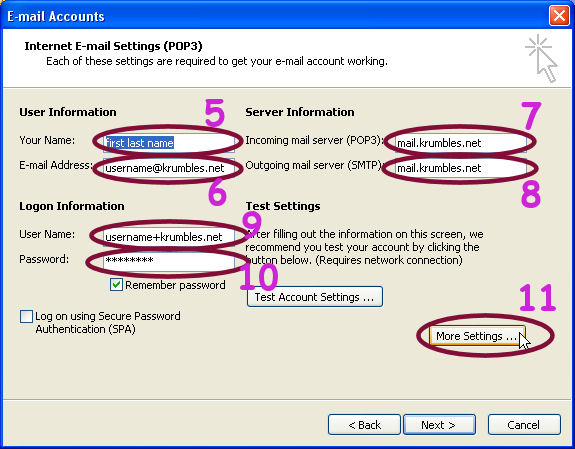
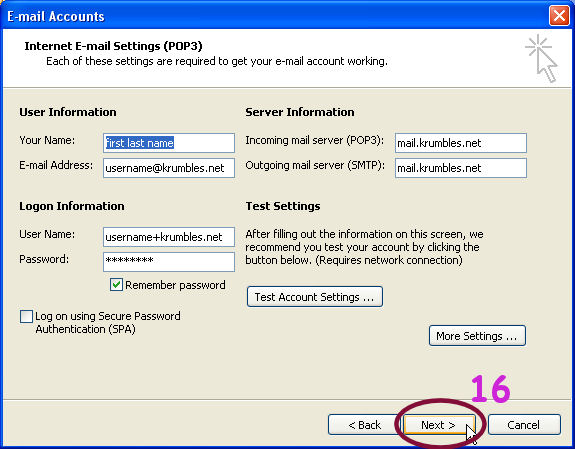
5.) Type in your name in the Display name box
6.) Type in your e-mail address in the form of username@krumbles.net
7.) In the Incoming mail server (POP3) box type in mail.krumbles.net
8.) In the Outgoing mail server (SMTP) box type in mail.krumbles.net
9.) Type in username+krumbles.net in the Username box
* your username is your email address before the @krumbles.net,
for example krumbles@krumbles.net would
be krumbles+krumbles.net for the username.
** be sure to use the plus (+) sign
10.) Type in your password in the Password box
11.) Click the More Settings button
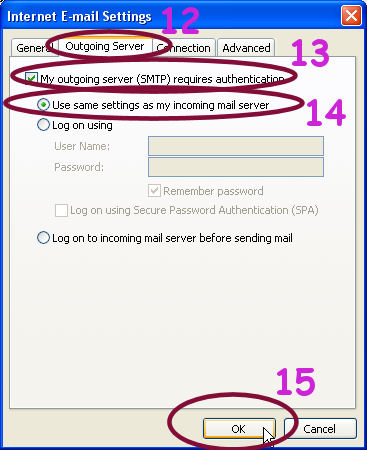
12.) Select the Outgoing Server tab
13.) Checkmark the box for My outgoing server (SMTP) requires
authentication
14.) Select Use same settings as my incoming mail server
15.) Click the OK button
16.) Click on the Next button
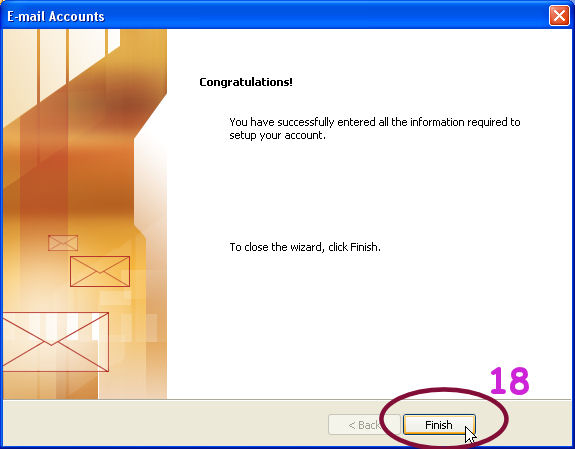
17.) Click on the Finish button
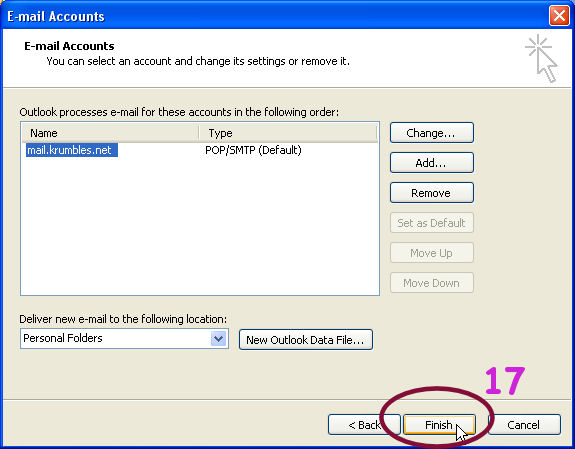
18.) Click on the Finish button